TENDA is one of the best selling and very popular brand. If you bought a Tenda Wi-Fi router then it is the best choice you made. All you need to do is perfectly configure the Tenda Wi-Fi router. How to Configure TENDA Wifi Router – Tenda Router Setup. Tenda Router Set up and Configuration 2024. Tenda N301 Wireless Router Login
The TENDA Wi-Fi routers are available in 150mbps and 300mbps speed. The configuration is the same for almost all the models of Tenda so you did not need to bother about if you having a different model.
In this guide, we will show you how to configure the Tenda Wi-Fi router with your own laptop or PC.
Tenda Router Setup and Full Configuration
How to Setup TENDA Wi-Fi Router
The thing is, you did not need any configuration CD to set up the TENDA Wi-Fi router. So, you just need a laptop or PC which is connected to the TENDA Wi-Fi router and follow the below steps:
- On your computer or laptop open any browser.
- Click on the address bar and type 192.168.0.1.


- Press Enter to reach the login page.
- Once the login page appears then type the following;
- Username: admin
- Password: admin


- Now press OK to log in securely.

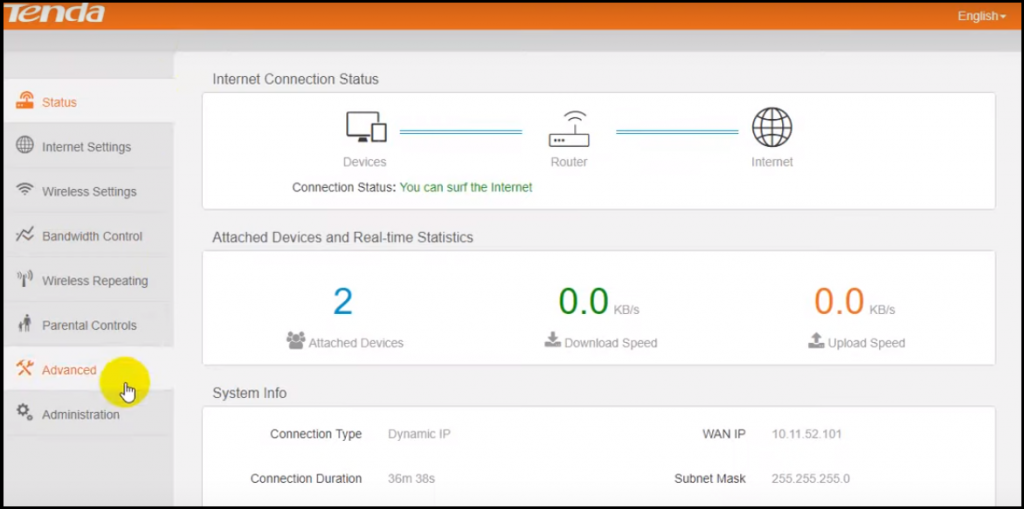
- You can see the status page it shows you the connected devices, downloading speed, uploading speed, connection type and etc…
How to Change Connection Type and Internet Settings In India
- Same as the above steps log in to the TENDA portal.
- Click on the Internet settings located on the left side of the pane.

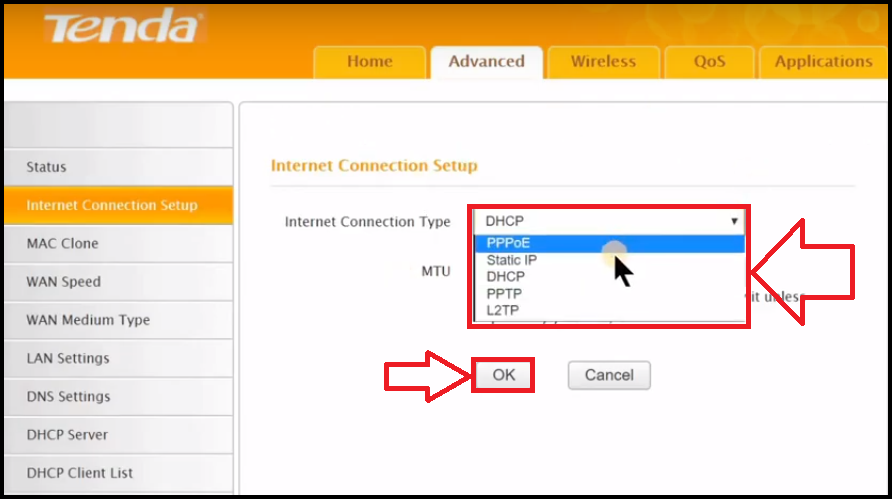
- Here you can choose the connection type to PPPoE, Dynamic IP, and Static IP.

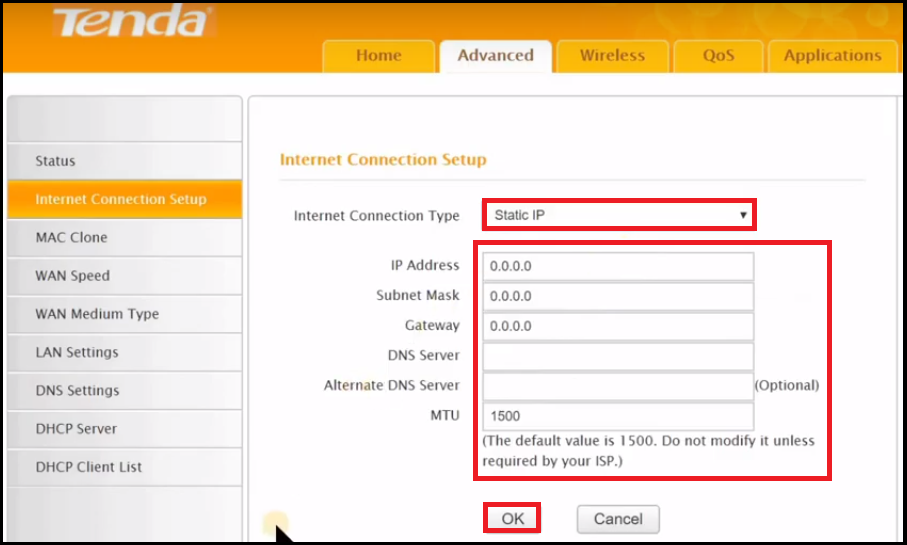
- Enter IP address, Subnet mask, Default gateway, DNS server, Alternate DNS server, MTU, and click on OK to save the changes. (Generally, the settings are already configured so it is safe to not to change these settings).
The above process is the quickest and simple to configure the static IP on the TENDA Wi-Fi router.
How to Change TENDA Wi-Fi ID and Password
It is very easy to change the username and password of the TENDA Wi-Fi router. Just you need is to follow the steps given below:
- Open any browser and type 192.168.0.1 on the address bar.
- Press Enter to go to the login page.
- Enter username and password and click on OK.
- Now click on the Advanced options.
- Next click on Wireless option located on top of the page.
- Click on the Wireless Basic Settings which can find on the left side of the pane.

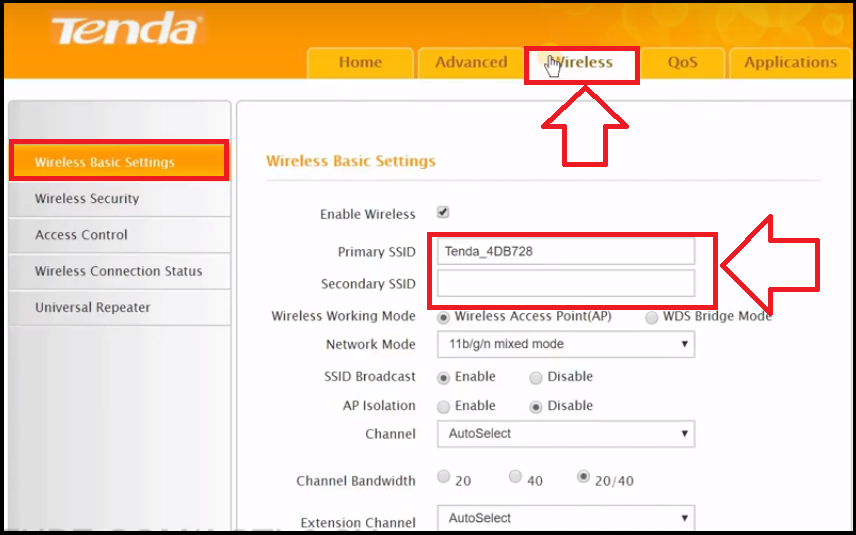
- Type the primary SSID and secondary SSID.
- Press on OK to save SSID.
- Go to the Wireless security which is just below the ‘Wireless basic’ settings.

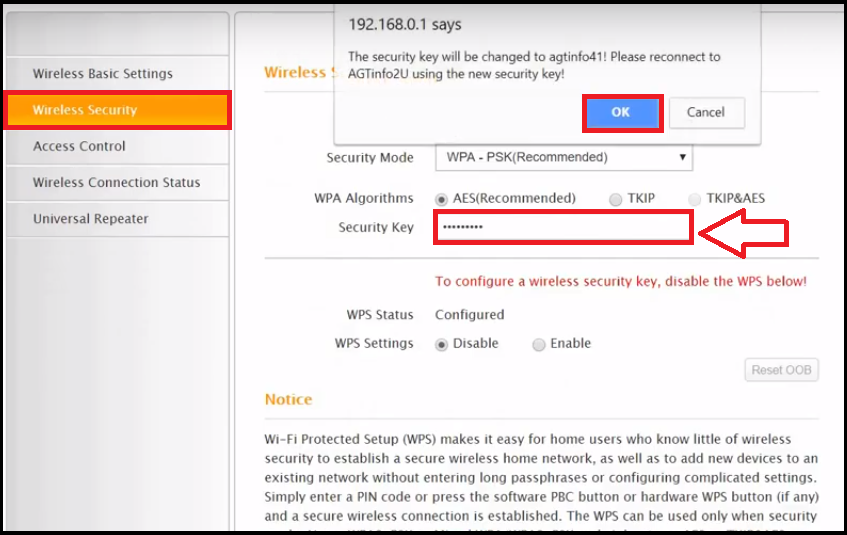
- Here you can change your Wi-Fi network password.
- Click on OK to save the password.
After changing the settings your TENDA Wi-Fi router will start rebooting. Once the router is restarted successfully try to reconnect and enjoy.
How to Enable Remote Access Web Login
If you are trying to enable the WAN web access of the TENDA Wi-Fi router then you need to enable the remote management option. Follow the below steps to know how to do it:
- Open the browser and go to 192.168.0.1.
- Press Enter and type username, password.
- Click on OK.
- Now select the Administration option.

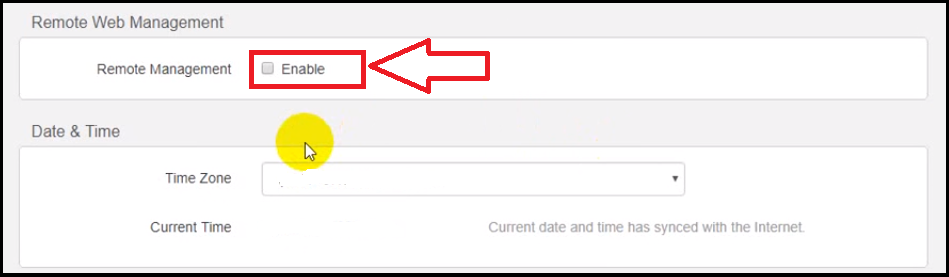
- Here you will the Remote Management option so just check the box.

- Click on OK to save the settings.
Once you enable this setting, you are the only one who can access your TENDA router through the web.